
Add Offline Hauler Trucks to a Job in the TruckIT Portal
Learn how to dispatch a job using trucks from an offline hauler.
TruckIT · Haulers & Partners

Start a New Job
You can add an offline hauler’s trucks to a job right from the dispatch screen, the same way you add your own fleet. The hauler and their trucks must already be set up in TruckIT.
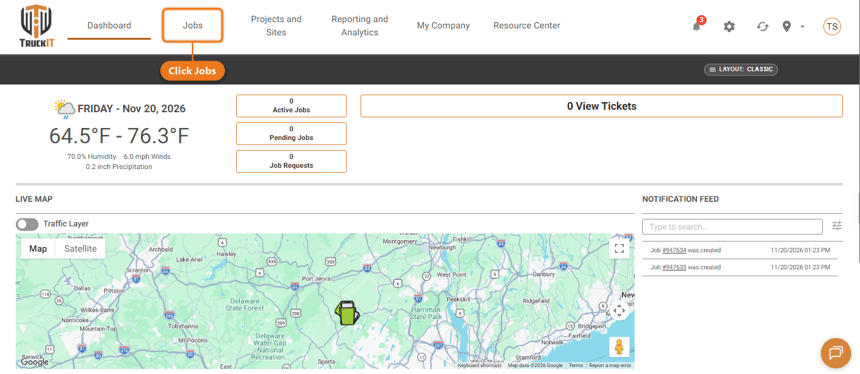
1. Click Jobs. From the TruckIT Web Portal, click Jobs in the top menu.
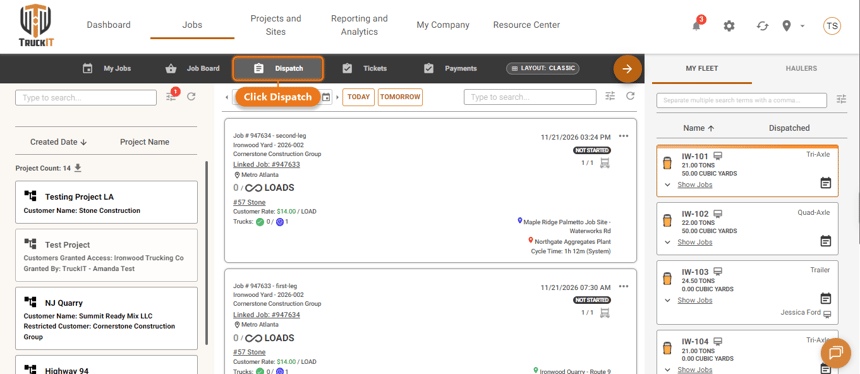
2. Click Dispatch. Open the Dispatch tab. If you don’t see it, ask your company administrator or TruckIT Support for access.
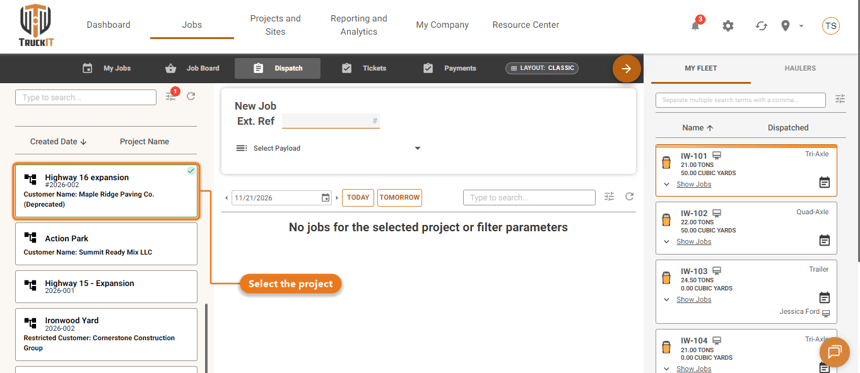
3. Select the project. Choose the project you want to dispatch from the list on the left.
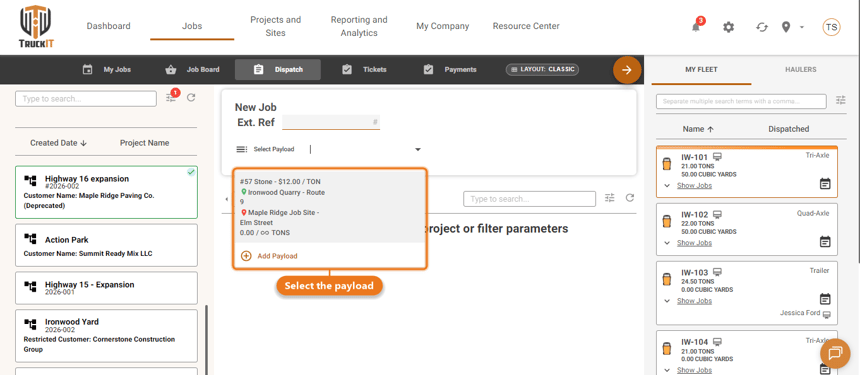
4. Select the payload. Open Select Payload and choose the payload for this job. The job details fill in from the payload.
Add the Hauler’s Trucks and Save
1. Click Haulers. On the right side of the screen, switch from My Fleet to the Haulers tab.
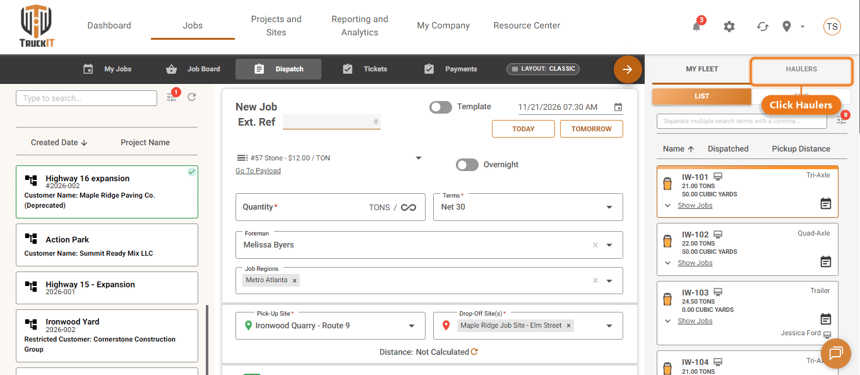
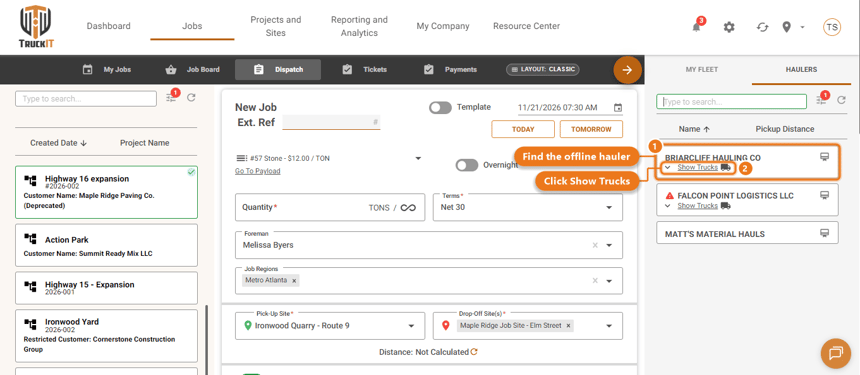
2. Find the hauler and click Show Trucks. Locate the offline hauler in the list and click Show Trucks under their name.
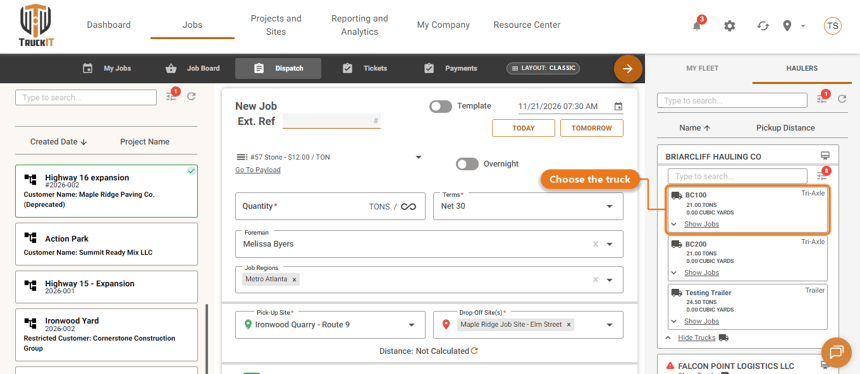
3. Choose the truck. The hauler’s trucks appear below their name. Find the truck you want to assign.
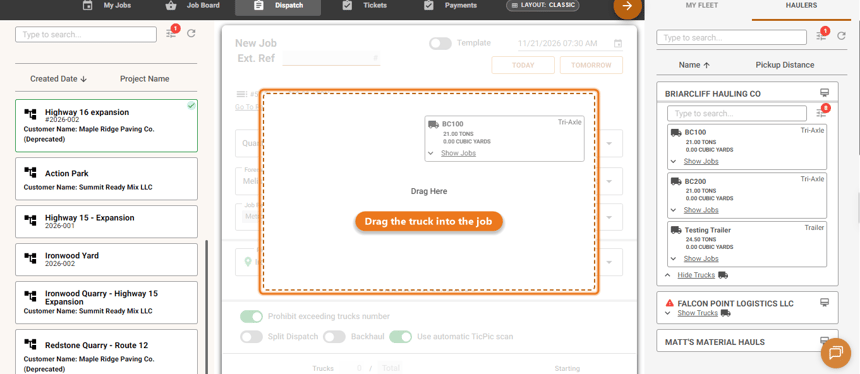
4. Drag the truck into the job. Drag the truck card into the Drag Here area. Repeat for any other trucks you need.
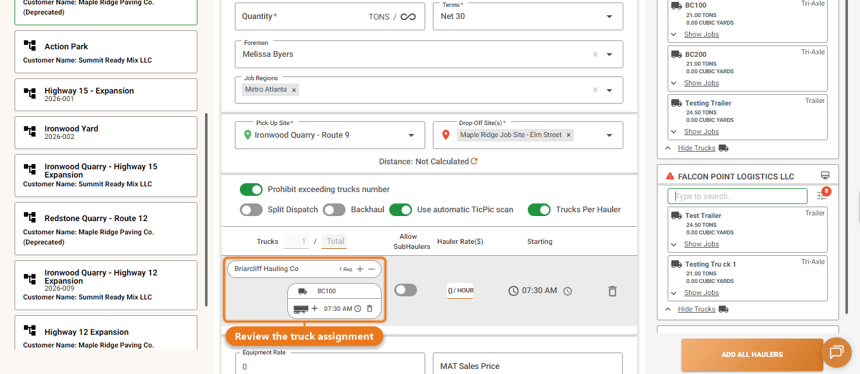
5. Review the truck assignment. The truck appears in the job’s truck list under the hauler’s name. Check that the right hauler, truck, and start time are listed.
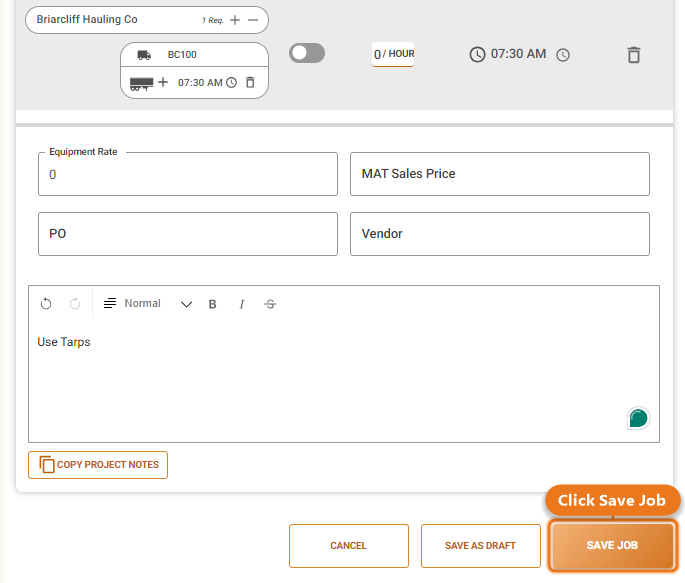
6. Click Save Job. Add any driver notes, then click Save Job.
When to Use Offline Hauler Trucks
Use offline hauler trucks when a hauling partner doesn’t manage their own TruckIT account and your team dispatches their trucks for them, or when a job needs extra capacity from a subhauler.
Tip: keep each offline hauler’s truck list up to date so inactive trucks don’t get assigned by mistake.
What Happens Next
The offline hauler’s truck is now assigned to the job and shows on your dispatch list with the rest of the day’s work. If plans change, you can add or remove trucks on the active job.
Related Articles
 Questions? support@truckit.com